Tuesday, April 23, 2013

Butterfly Change-ups: Guest Post

I am very excited to have Hayley guest blogging here today!! She is a super talented, amazing sewist. I love all her projects and I'm sure you will too! Thanks so much Hayley!!!
~~~~~~~~~~~~~~~~~~~~~~~~~~~~~~~~~~~~~~~~~~
Hey everyone.  My name is Hayley from Welcome to the Mouse House and I am very excited to be here at Esther's blog today to share a fun tutorial.  Thanks for having me, Esther!

My daughter Ainsley is 3 years old and she LOVES accessories that coordinate with her outfits.  I came up with a super cute and easy way to add some flair to the clothes she already owns.  The best part?  It uses scrap fabrics, which I have a TON of!  

Butterfly Change-Ups

Turn your basic clothing into unique, changeable pieces!
From plain...

To accessorized and interchangeable!


Supplies Needed:
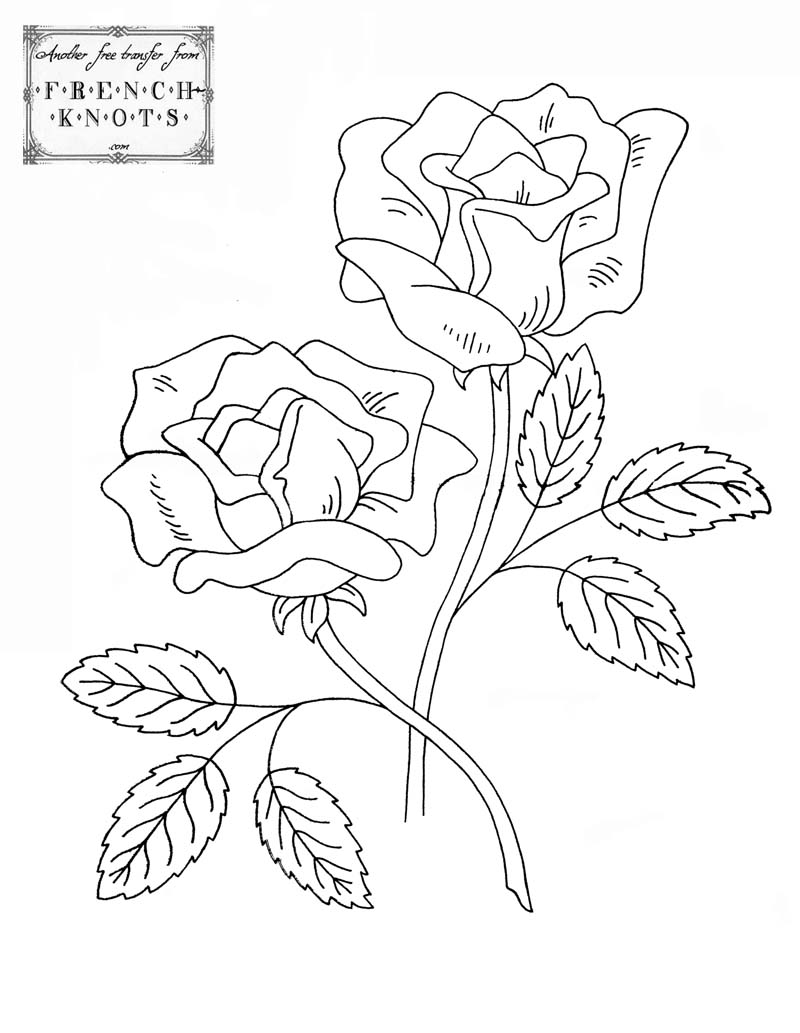
*butterfly template (found HERE)
*scrap fabric
*scissors
*buttons
*clothing that you want to embellish
*thread
*sewing machine
*button hole foot

(optional items)
*fabric stiffener 
*plastic wrap
*cardboard

Let's make some butterflies!
Gather your supplies

I have included two sizes of butterflies in the printable templates.  If you want larger or smaller, it is very easy to switch the printing percentages to get the size you want.

Grab the fabric, cut out your butterfly template and start cutting.
Cut as many as you would like.  More butterflies are going to give a fuller end result, but they will also be heavier, so keep that in mind for the tshirts.  I used 2-3 large butterflies for the tshirts, but 4-6 butterflies for the smaller accessories.

After cutting, stack them on top of each other.

Sew a button hole in the middle of the stack.  


Do that with all your stacks of butterflies


Pick out the buttons you would like to use

And call over your little helper to see what buttons she would like

Sew the buttons onto your clothing items

I chose to sew a large button on the middle of the tank, a smaller button on the pocket of the shorts, and a small button on the elastic headband.  Obviously, you can put the buttons wherever you would like.

Now, attach your butterfly change-ups wherever you would like!


Not only can you create different looks with the outfits and hair accessories, but they are all removable for washing purposes!

Optional

This step is totally optional, but I really like it because it gives the fabric more body.  I use a "fabric stiffener" when I want my fabric to have some hold.

For this step, you need to grab the stiffener, plastic wrap, cardboard, and your fabric butterflies

Spritz each butterfly (and each layer) with a generous amount of fabric stiffener.  

Once wet with the stiffener, lay each butterfly right side down over top of a tented piece of cardboard covered in plastic wrap.  Let dry for at least an hour.  You can speed up the process with a hair dryer.  (the reason you lay it over the tented cardboard is to give it an angled shape!)

Repeat the process for all the butterflies

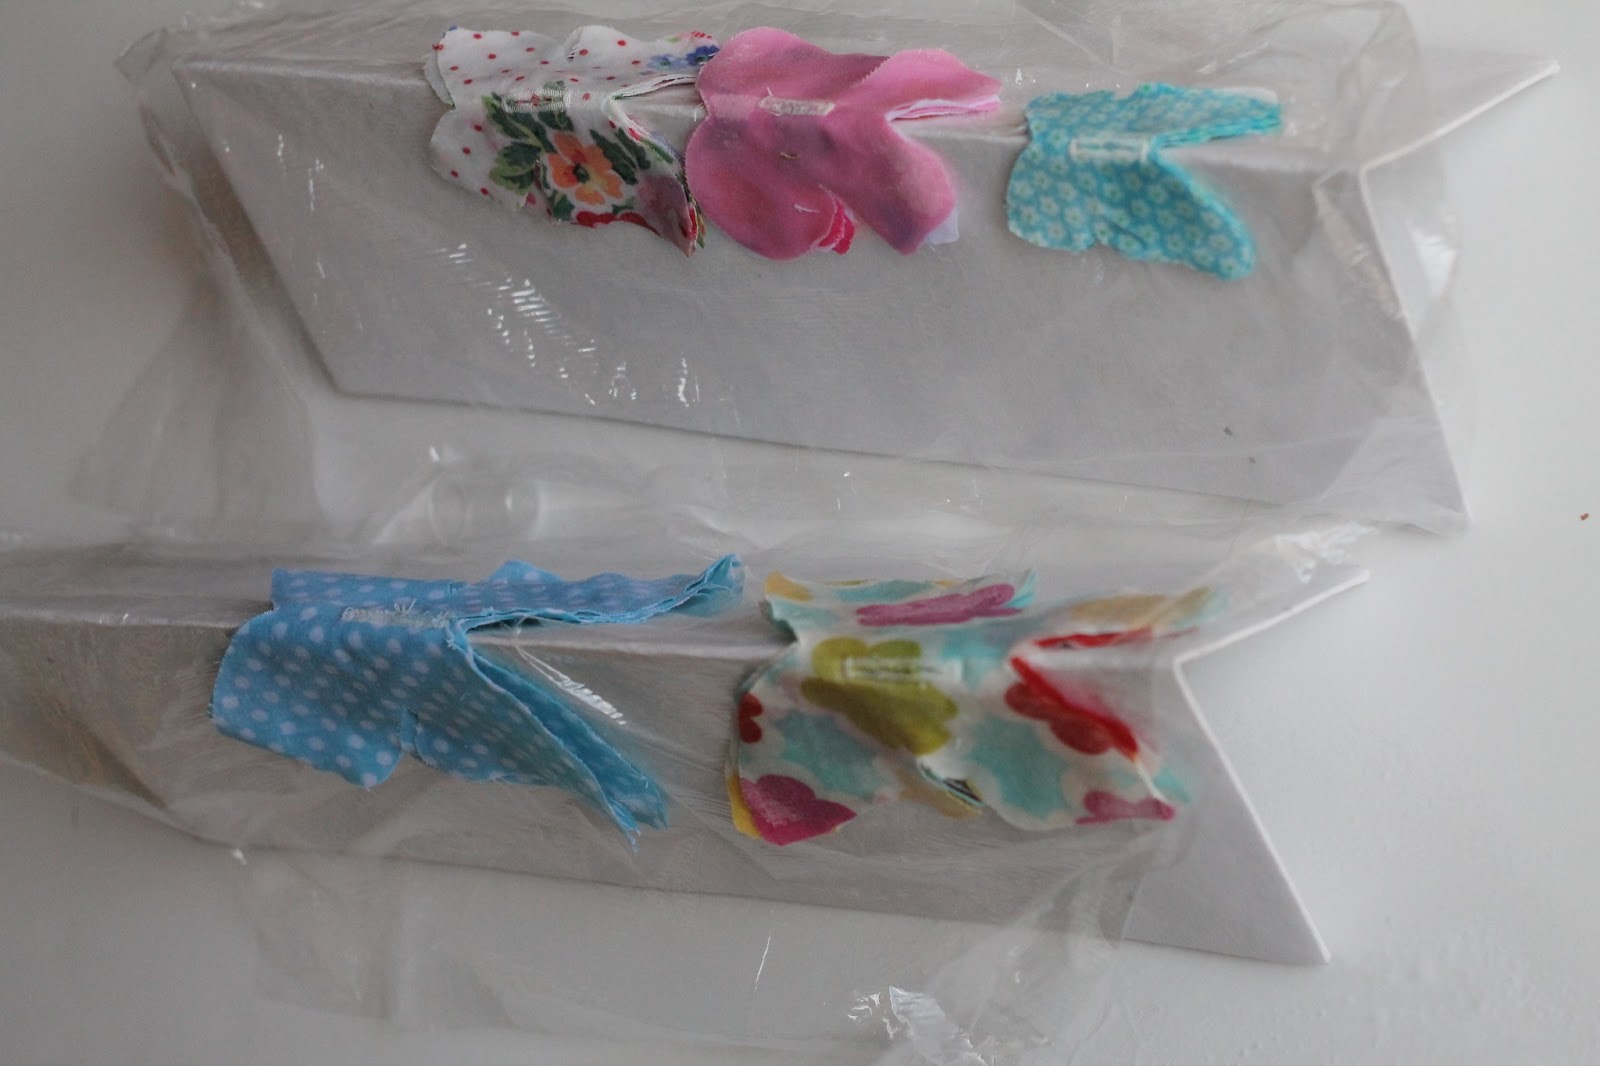
Once dry, they have a definitely starchy quality and they won't flop around.  Again, this step is totally optional!


Hope you guys enjoyed the tutorial!

Check back next week to see another butterfly tutorial on my blog
(sneak peek!)


Follow Me on Pinterest

Friday, April 19, 2013

Another Monogrammed Half Apron

Sorry for the bad quality photos - I only had time for a quickie photo shoot!
Another monogrammed half apron! This is basically identical to the first one, except the embroidery is a little different. It's very simple, but putting on the monogram adds a little personal touch.
Measurements:
Cut one piece 27" wide x 22" tall (main body)
Cut one piece 27" wide x 3 1/2" tall (white border)
Cut one piece 18" wide x 3 1/2" tall (waistband)
Cut two pieces 30" wide x 4" tall (ties)
These are approximate measurements - you can do it pretty much any way you want to and it really isn't going to make a huge difference.
Directions:
Follow the directions for a basic half apron, except you will be sewing the border piece to the body horizontally instead of three vertical body pieces. Other than that, the directions are the same. 
Monogram:
I just typed out the letters on Wordpad (equivalent of Word), and then went through the fonts to see what I liked. I wanted it to be fairly simple so that it would be easy to embroider. I am horrible not good at doing "thick-and-thin" embroidery at this point. It takes waayyy too much precision work. The font I used was Calibri Light. It worked pretty good. For tracing, I print out the design on regular paper, tape it to a glass table with a light underneath, tape the fabric to the design, and then trace it with a wash-out marker. It takes a little time, but it works pretty well. 
Have fun!! See the child's apron I made out of this fabric here.


~~~~~~~~~~~~~~~~~~~~~~

Thanks for visiting!! Please follow my blog!


Follow Me on Pinterest

Tuesday, April 16, 2013

Tuck Stitch Afghan (Knitting Machine)

Tuck Stitch Afghan
Made with Patons Beehive Baby Sport. I highly recommend it - it works on the standard knitting machine, and even just for regular handwork, it is VERY soft.

Here is the pattern:

7 skeins Patons Beehive Baby Sport
Card No. 5 for the Knitking KH-260 Bulky Knitting Machine
Use your standard knitting machine. The bulky card will work on there perfectly. (If it is a Brother)
Tension 8-2
Cast on 100-0-100.
Knit 3 rows. Set carriage for pattern knitting. Knit 773 rows. Set carriage back to regular knitting. Knit 3 rows. Bind off. Using a size 5 crochet hook, with the wrong side facing you (not the pattern side), single crochet in every stitch all the way around. *When you get back to the beginning, slip stitch to first sc. Ch 2, double crochet in every stitch. Increase by 1-2 stitches in each corner, whatever makes it lay flat enough for you. Repeat from * until you have 3 rows of double crochet. Tie in ends.


Follow Me on Pinterest

Saturday, April 13, 2013

Chevron Ruffle Tote: Pinterest Project #4


~
 Here we have my 4th Pinterest Project from Six Projects in Six Weeks!!! It is a ruffle tote made with Riley Blake green chevron, some coordinating cotton from Joann, and a tote bag from Walmart. They come in a three-pack for about $8. (Kinda pricey if you ask me, but whatever. It's worth the investment.) The pattern for this is from Blue Robin Cottage. I fell in love with this tote a while back, pinned it, and of course forgot about it. So that is why I started the Six Projects in Six Weeks ~ to utilize all the awesome stuff we've pinned on Pinterest!! 
I pretty much followed all of her directions, except that I made the ruffles go all the way around the tote instead of just on the front. Also for the ruffling - I basted at 3/4" and 1", and then sewed in between the two baste lines. I tripled the entire width of the tote (front and back), and cut that much fabric out. (I had to piece it). When you are pinning it on - just overlap the edges on one side of the tote - they don't really show that way. On the top ruffle I removed the basting stitches after sewing it on so that they didn't show. My flowers are made just like this except that I sewed them instead of gluing. I just pinned them on with safety pins too - that way I can take them off before washing.
 Have fun with this project - I know you'll love it as much as I do when you're done. Feel free to comment and share a picture of yours! 


~
Thanks for visiting!! Please follow my blog!! 


Follow Me on Pinterest

Thursday, April 11, 2013

Pink {Cherry} Angel Food Cake and a Pinterest Project!

I made this delicious cake yesterday, and couldn't help taking a picture of it!!  
I used one Duncan Hines Angel Food Cake mix, substituting 3/4 c. of water for maraschino cherry juice. Add the remaining 1/2 c. of water. Bake as directed.
For the whipped cream:
Use heavy whipping cream, adding 1/4 c. cocoa and 1/2 c. confectioner's sugar. Beat on high until almost "set." Add 1/2 tsp. vanilla. Finish beating cream. Note: you may need more sugar - go by the taste.
For the cherries:
Melt 1 cup semi-sweet chocolate chips with 5 tablespoons of butter. Drain about 25 cherries. Coat the cherries with chocolate, and put them on a sheet of wax paper. Freeze until ready to use. 
For the piped chocolate:
Use the remaining melted chocolate from the cherries. Put in a ziploc bag and cut a very small hole in the corner. Now just pipe to your heart's content!! (Make sure you pipe onto wax paper or you won't be able to get it off!!) There is no right or wrong way to do it - just kinda whatever you feel like!! Freeze until ready to use.
Enjoy!!! See my other project below:
~
 ~
I FINALLY got my dry erase board!!! I got the frame from TJMaxx for $10, and the markers from the store for $2 {clearance...yayy!!}. I highly recommend getting a marker with the eraser on the end - that way you don't have to have a giant one laying around someplace. I'm not very happy with the paper behind (a drawing made by yours truly ~ this reveals how h-o-r-r-i-b-l-e of an artist I am), but I haven't been able to find paper big enough. The frame is 11x14, so scrapbook paper doesn't fit. I will have to find a piece of {chevron} wallpaper. {It's GOT to be chevron, right?!!} Anyway, all in all, I got another Pinterest Project done!! Only three more to go as you can see below.


~~~~~~~~~~~~~~~~~~~~~~~~~~~~~~
Thanks for visiting!! Please follow my blog!!


Follow Me on Pinterest

Sunday, April 7, 2013

Little Girl's Chevron Apron & Bow Folded Napkin

Two projects from Saturday's Six Projects in Six Weeks Pinterest challenge!! Not a bad start. First of all I made a child's apron. It isn't like the one in the picture at all, but it is a child's apron, and that was the goal. It was super easy, just like a miniature regular apron.
Cut out:
one 28" x 16 1/2" piece (body)
one 15 3/4" x 4 1/2" piece (waistband)
two 24" x 2 3/4" (ties)
~Follow the basic directions for an apron, found here. Have fun!! {Scroll down for the other project}


The other project is a bow-folded napkin (shown below). The tutorial for that can be found here (Nancy Creative). This is very easy, and works best with smaller napkins rather than huge ones. These would be very cute for Mother's Day, a baby shower, or any occasion.


~~~~~~~~~~~~~~~~~~~~~~~~~~~~~~~~~~~~~
Thanks for visiting!!! Please follow my blog!


Follow Me on Pinterest

Saturday, April 6, 2013

Six Projects in Six Weeks

Seeing this page on Brittany's Joy gave me the idea of doing the same thing. Pick six things from you Pinterest boards, and try to just get them done in six weeks. Sounds like a great idea to me!! Pinterest is VERY addicting, and we all tend to pin everything we see, but whether we would ever look at it again is a good question. So here we go. Let me know what you pick!! Here's my choices:

Top row, left to right:

Bottom row, left to right:


~~~~~~~~~~~~~~~~~~~~~~~~~~~~~~~~~~~


Follow Me on Pinterest

Friday, April 5, 2013

Peekaboo Beans Clothing Review

I recently won a giveaway at Welcome to the Mouse House for $50 of clothing at Peekaboo Beans. They have SO much cute stuff for kids. I got several items, and they are absolutely adorable!! I got the Laughter Jacket in Memoir FuchsiaCo-Pilot Tee in Harbour Blue, and the Cloud Cruiser Jacket in Harbor Blue. The little boy jacket and shirt go together great too!! They are all extremely adorable and well-made. The fabric is SUPER soft, featuring tear-away tags, "chin-guards" so little chins don't get zipped in, and reinforced hems on the t-shirts. I would highly recommend these to anyone with kids - they are awesome!! Thank you SO much Hayley for the giveaway!! Here's some pictures of the beans:


 ~~~~~~~~~~~~~~~~~~~~~~~~~~~~~~~~~
Meanwhile, the current project is an embroidered rose. I LOVE roses, so this is definitely going to be one of my favorites. I got the pattern at French Knots - they have TONS of awesome embroidery and cross-stitch patterns. Thanks for visiting, folks!! 

~~~~~~~~~~~~~~~~~~~~~~~~~~~~~


Follow Me on Pinterest